Sunday, May 12, 2013

1/100 MG Gouf Custom WIP 4

Hey guys, new update here in regards to my Gouf Custom. I was out of town last week and then i had finals this week so I didn't have much time to work on it. But finally I had some time today (on mothers day lol) to finish my gouf customs Gatling shield. I did some chipping and rust streaks but I don't know how well they came out. I think my sponges pores were too big, may have to sue as smaller sponge. Well, let me know what you guys think and any tips n tricks you think I should know. Well till next time~


Sunday, April 28, 2013

1/100 MG Gouf Custom WIP 3

Hey there guys another WIP post update from your good friend and fellow Gunpla'r Nayiro! Alright so today I tried my hand at pre-shading, never done it before. I researched it extensively (watched a video and talked to a few people) and decided I can do it. I went at it and lo and behold it wasn't as difficult as I thought. I think I messed up in a few areas but I believe I know what to do for  the future. I started on the Shield Gatling for a few reasons. One, if I mess up it's ok, i can make it into battle damage and two I can always remove it from the main suit. But I rather not do that, anyway here are a few pics of some of the pieces, most of them look like this so I didn't bother taking a picture of each piece. I would absolutely LOVE to hear some C&C on my pre-shading and what you guys think I can improve on. And as always, have a good one~


This will be  the color for the inner frame (Alclad II Magnesium)


Saturday, April 27, 2013

1/100 MG Gouf Custom WIP 2

Hey there guys, worked a bit on the shield today. I think it came out alright. I tried to make it seem like the top half got blasted off by an energy cannon, I think imma need to fix it up a bit. I added some bullet holes to the shield, I kinda like how they came out actually. And lastly I tried to make the little blast shield by the Gatling look dented and beat up, how'd I do? Well, small update hope yall are enjoying it. C&C is always welcome. Thanks for viewing!


Monday, April 22, 2013

1/100 Mg Gouf Custom WIP

Hey there guys! So  I started working on my MG Gouf custom, I want to try weathering and battle damage and what better kit to do it on than a MG....right? This is for an event going on over at The Mecha Lounge, an awesome forum full of kind individuals who love giving advice and just shooting the shit with. In this event there are two sides, ground team and air team, since I chose the Gouf Custom I figured he would be in the ground team. I have many ideas for this guy, hopefully I can incorporate them all or most. I roughly sketched out what I plan to do with the guy as seen below.


And as you can see, planning on really modding this guy and really making him battle damaged, I even have a neat little back story to this guy and his pilot for the war going on, gonna be fun to write. Anyway, I digress, there are a few things here that I plan on adding that aren't in the picture. For instance I want to add a scope to the barrel of the gun to make it seem like an Anti-Air gun, but I don't know how I'm going to incorporate it. So far I have only done the shoulders adding rivets to them, going to be doing the same to the legs as pictured above.


I got the idea of Rivets from an amazing modeler and all around cool guy, Kamm, some of you may know him from the Mecha lounge and his amazing hand painting tutorial video. I found a chain whilst cleaning my room and noticed the balls on it would make perfect rivets, I cut them off to individual pieces and ended up with about 100 tiny balls. Each shoulder has 22 leaving me with about 78, hopefully I have enough. If I don't have enough, not sure where I can get more of these... Also I sharpened the spikes up, they're pretty pointy, kinda difficult to see in the picture. I cut off the tip of the big spike on the big shoulder and I'm planning to melt it off a bit once I get my tools in the mail.

Well  that's all for now folks, thanks for looking. As always would love to hear what you guys think about this, and also if anyone knows how to make a crack in plastic that would be lovely, going to add a crack to the visor but not sure hot to implement that. Toodles~


Friday, April 19, 2013

HGUC 1/144 Nu Gundam HWS - Complete

Oh man, it's been a looooong month already! My compressor broke so I had to wait about 2 weeks to finish this guy up for Dans contest. Honestly now that I think about it I don't believe my compressor was broke, I think my airbrush had a clog in it but it just never crossed my mind. Man do I feel dumb. Well lesson learned, always check your air brush!

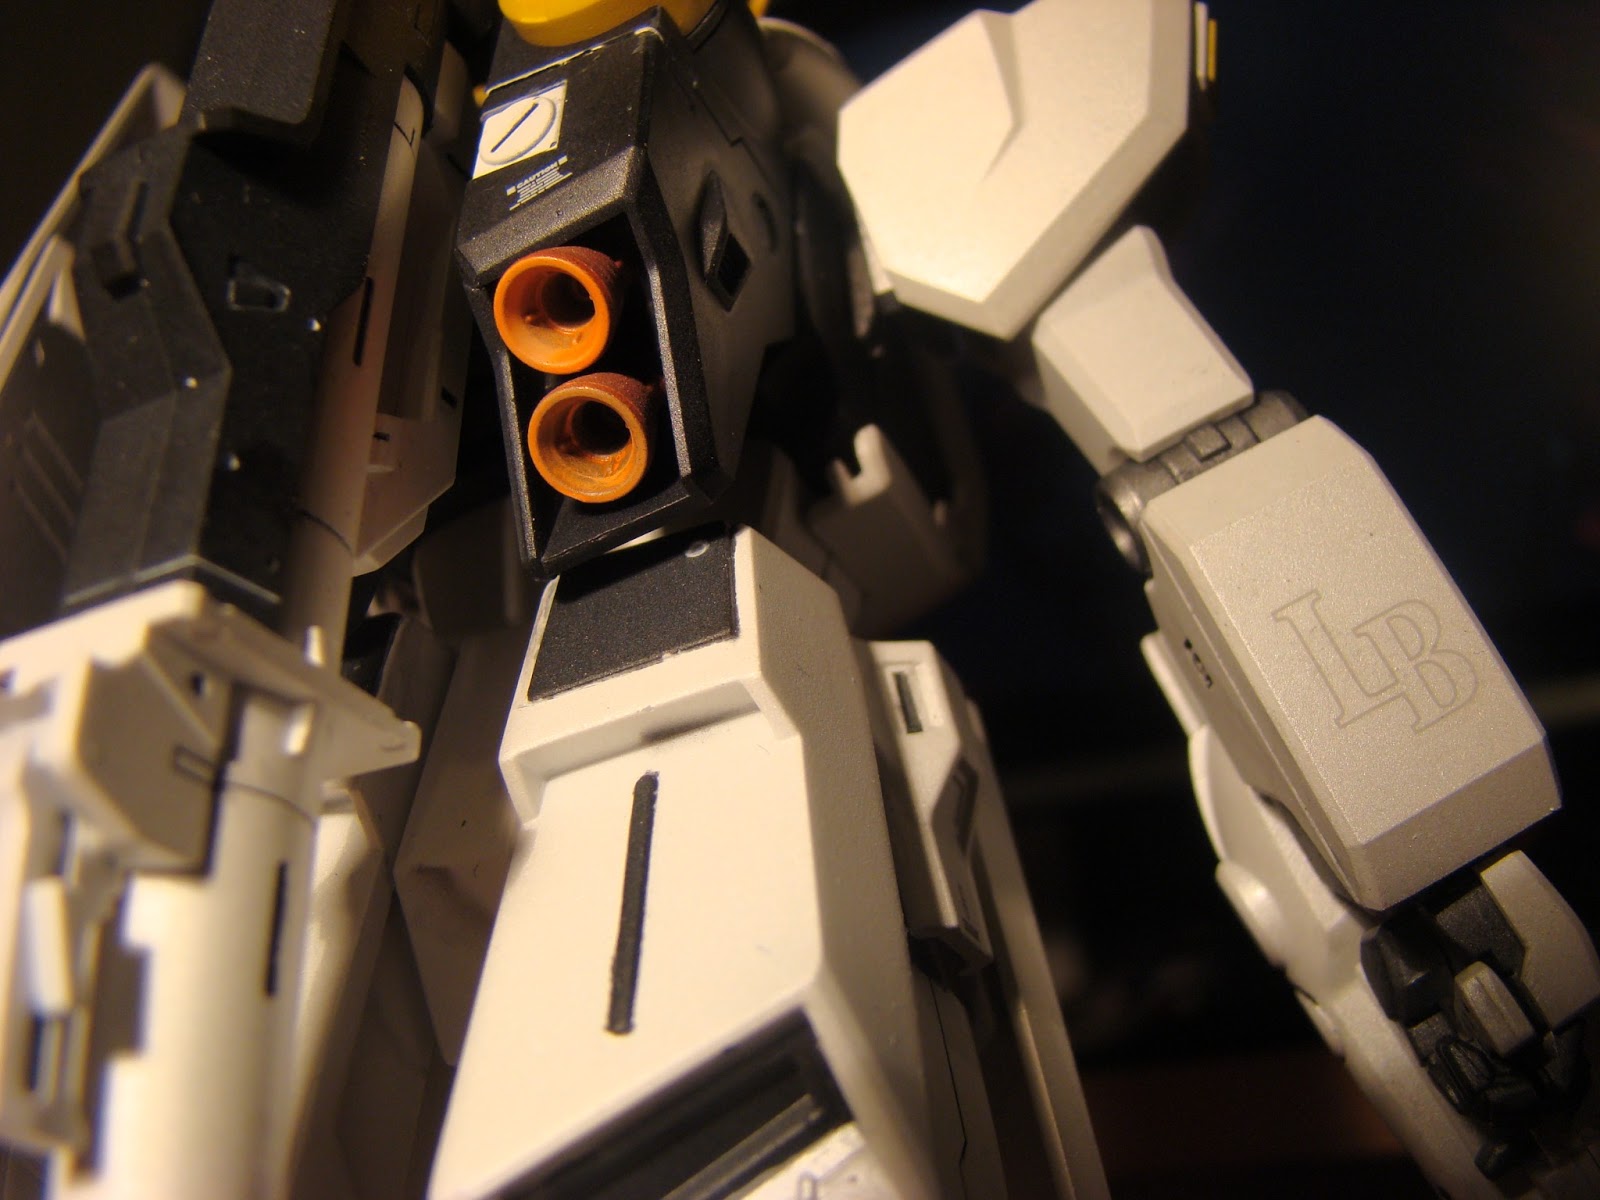
Well onto the kit. I had my own little take on the matter, first I converted all the dark blue pieces to black and the white pieces to a pearl white and honestly, I like the finish on em, they work well together. This kit was my first time actually using masking tape, I failed hard in some areas and succeed in others, you can easily notice where I messed up and where I was pro level (lol jk). I started using Tamiya copper for some of the small metal pieces like the thrusters (outsides) and the connectors for the funnels, really like how they came out, very nice look  to them. Gotta admit this yellow on black where the funnels are came out much better then I anticipated, happy about that. I did do some hand painting, like the missile pods on the shoulders, I painted those red to get a nice color split. I also hand painted the chin. I did kinda mess up on the panel lining, I dont know what it was but for some reason I kept getting smearing effects even after leaving it to dry for quite some time. Maybe it wasn't long enough. Well this ended up making the kit look kinda dirty, not what I was going for, kinda disappointed with that. The funnels also have no panel lining or decals simply because I don't think I would have made the deadline for the contest if I applied a coat of future (takes 48 hours to cure).

Lessons learned:
- Use masking tape for flat surfaces and do not try and cover up the area and cut it out if you can place it   around.
- Let your wash dry completely, especially if it's a "heavy" wash in deep areas (like the gun and shield)
- Be more careful when hand painting

Overall experience:
- Being my second fully painted kit, I would rate this an 8 on a 10 point scale. Compared to my sazabi, while the finish wasn't as good, the overall process of painting was muuuuch smoother.

Paint used (all acrylic unless otherwise noted):
- Tamiya Clear Red (for Eyes)
- Tamiya Red (Chin)
- Testors Enamel G.I Red (for missile pods)
- Tamiya Gun Metal
- Testors Pearl White
- Model Masters Florescent Red
- Tamiya Flat Yellow
- Tamiya Flat White
- Tamiya Copper
- Tamiya Flat Black
- Model Masters Flat Clear Coat
- Vallejo Gray Surface Primer


Monday, April 1, 2013

1/144 HGUC Nu Gundam HWS Complete...well almost

Hey there guys! I know I haven't been posting much lately but that's because i've been working on my Nu Gundam HWS for GoodGuyDans OOBBO Contest. I learned a lot from this kit and I actually really like how it came out. The black from the panel lining kinda dirtied up the white pearl, but I like the look of it, gives it a dirty look. Also, why I say I'm almost done is because the funnels aren't there. I didnt have enough clips when I was originally painting so I was gonna do them last, but lo and behold, my compressor went full retard on me. I'm gonna send it in on monday and hopefully I get it back soon so I can finish this guy off before the deadline. Kinda sucks =/

Well, I know it's not the best, but I'm proud of it! Let me know what you guys think of it!